

How to use the Slice tool
The Slice tool cuts a picture into rectangles that export as separate images, for web graphics, banners or a grid of tiles.
Where to find it
It is in the toolbar, in one slot with Crop and Slice Select. Right-click the slot, or press and hold it, to choose between them. Press Shift+C until it is selected (C on its own picks Crop).
How to use it
- Choose the tool. Press Shift+C until it is selected, or right-click the crop slot and pick Slice.
- Draw the slices. Drag a rectangle for each part you want. Each gets a number; the rest of the picture is filled with automatic slices.
- Name them. Select a slice and type a name in the options bar, so the exported files are easy to tell apart.
- Export. Choose File → Export Slices and pick PNG ZIP or JPEG ZIP. The ZIP is made on your device.
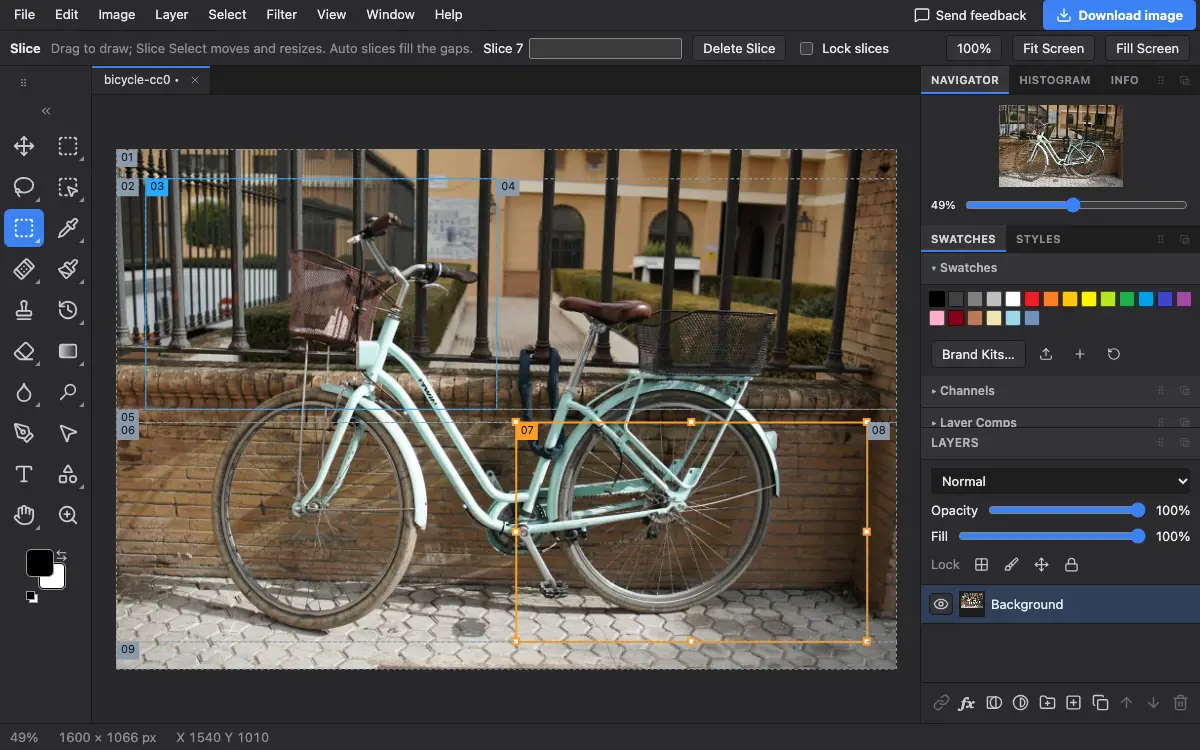
Options bar settings
Tips and common mistakes
- With no slices drawn, the same menu reads File → Export Slices from Guides and cuts the picture along your guides instead.
- Use the Slice Select tool to move or resize a slice after drawing it.
Related
Photostar is a free online Photoshop alternative that runs in your browser. There is no account to make, and your files stay on your device.
Checked in the current editor.