

How to use the Sponge tool
The Sponge tool changes colour strength where you paint: it can make colours richer or wash them out towards grey.
Where to find it
It is in the toolbar, in one slot with Dodge and Burn. Right-click the slot, or press and hold it, to choose between them. Press Shift+O until it is selected (O on its own picks Dodge).
How to use it
- Choose the tool. Press Shift+O until it is selected, or right-click the dodge slot and pick Sponge.
- Pick a mode. Choose Saturate for richer colour or Desaturate to mute it.
- Set Flow. Start low; each stroke goes up to the flow, and painting again adds more.
- Paint. Brush over the parts to change.
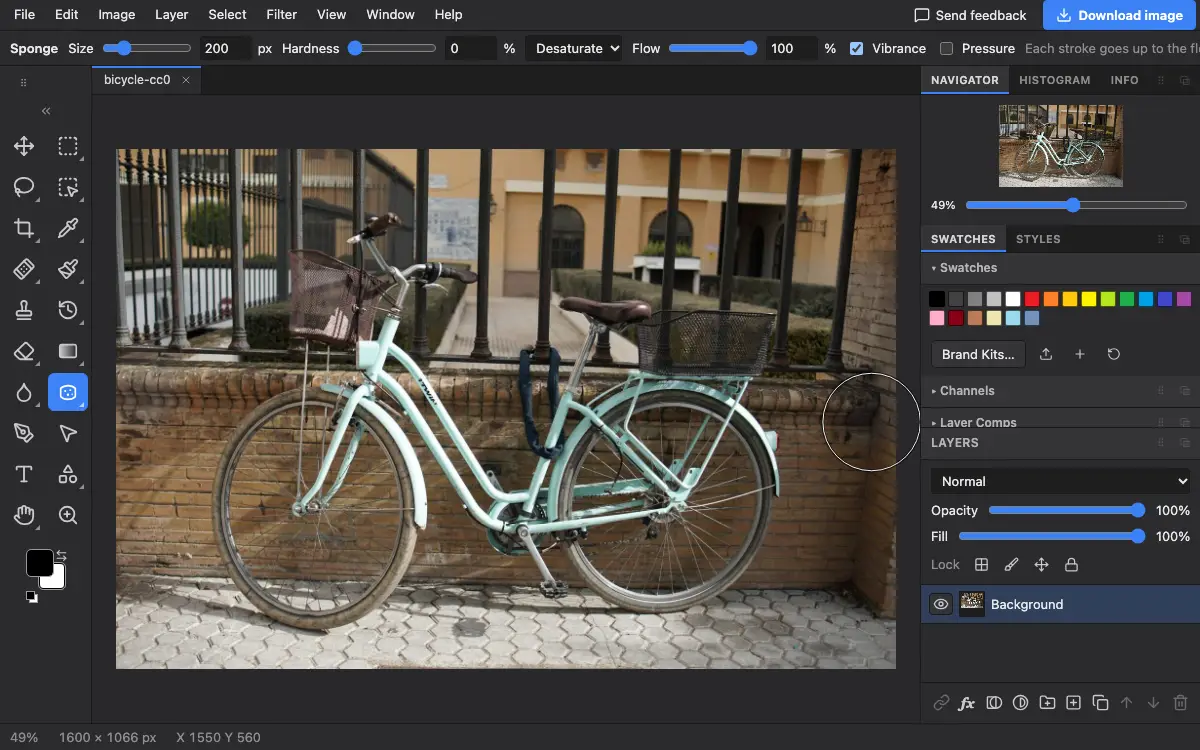
Options bar settings
Tips and common mistakes
- Desaturate everything except one object for a colour pop effect, then check edges at 100% zoom.
- For colour changes across the whole photo, Image → Adjustments is quicker and easier to reverse.
Related
Photostar is a free online Photoshop alternative that runs in your browser. There is no account to make, and your files stay on your device.
Checked in the current editor.